2013-04-13

Cornerweight, for real


Last attempt to weight my car using bathroom scales failed miserably, so I took a trip to Speedlab Racing and got help so set up the corner balance properly using their professional equipment.

Without driver the car weighted 590kg, race ready with a bit more than half tank of fuel.

After some adjustments a perfect 50% cross weight was achieved.


With driver and helmet, without nose-cone and bonnet.

It was also fun to take a look at their awesome Corvette-based race car! It is really something extra and worth a trip on its own. Take a look at their home page!


2013-04-07

Does wider tyres equals more grip?

On a thread on Pistonheads someone claimed that wider tyres doesn't mean more grip.

Theoretically, the tyre size does not change grip as Amontons 2nd law states that friction force remains the same. The tyre size is really about matching width to the amount of energy being transferred to the ground, i.e. narrower tyres will run hotter.

Before I get shot down in flames, there are many other factors but the principle that a wider tyre will provide more grip is not necessarily the case unless you have the power to keep them warm.

I would say that the author of that comment is both right and wrong. The reasons why is far from obvious. I'm not an expert in any way but I do enjoy reading up on subjects that interest me. Race car rubber is one of them! But please take it for what it is.

Contact patch
Contrary to common belief the contact patch is not bigger with wider tyres, with the same internal pressure. The contact patch is calculated with area=load/pressure. With wider tyres the contact patch is obviously wider than with a narrow tire, but the area is the same.

Amontons 2nd law is tempting to use here, but rubber's friction is not that simple. Rubber generates friction in three different ways: adhesion, deformation, and wear. The generated friction force is not linear and very complicated.

Slip angle
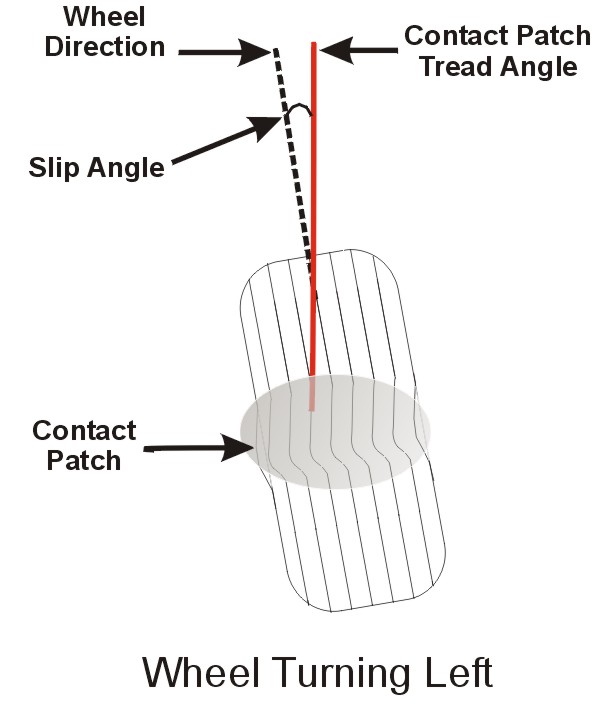
Slip angle is what generates grip, or to be more precise - lateral force. When a race car is cornering, the slip angle is the difference in what direction the tyres are pointing and the direction the car is heading. A race car generates maximum lateral force around 7-11 degrees of slip.

The term "slip angle" is a bit missleading, as with small slip angles there is no slip in the contact patch. In fact, it is the elastic nature of rubber that does the work here.

Lateral deformation in the contact patch
This is where the magic begins. The lateral force is generated by the tyres resistance to deflection. The deflection is not the same along the contact patch, but is built up gradually, non-linear.

So what is your point??
That wider tires do provide higher levels of lateral grip, because the wider contact patch leaves more room for the tyre to resist deflection. And resistance for deflection = force.

And heat?
More grip = more energy = heat. Too much of it means overheating, to little means cold tires. Wider tyres get warmer (not cooler) than narrow tires, because they generate more lateral force! They also cool faster than narrow tyres, because they have a larger surface area. And that is what makes it problematic.

Conclusion
Wider tyres = more grip in the corners. If you don't utilize the higher level of grip, they'll cool too much on the straights and they'll be outside of optimal temperature range.

Source and recommended reading:
The racing & high-performance tire - Paul Haney

When I wrote this post I sent an email to Paul to confirm a few thoughts. He wrote back to me within an hour - respect!

2013-03-05

Nose cone aero whiskers


Mega downforce nose cone whiskers for less understeer in fast corners. These beasts will add at least 50g of downforce even at low speeds.

I glued them on with melt glue until I was satisfied with the positioning.

Then I drilled three small holes through each whisker, removed the glue and pop riveted them in place.

2013-02-23

Supercharged CSR for sale

There is a supercharged CSR for sale at PistonHeads with some interesting technical solutions.


As one can see the air intake is on the rear part of the bonnet through a remote filter canister and the plenum has its intake on the underside. The intercooler intake is below the radiator in the front.

I suppose the pedal box would make a solution like this much harder on a LHD car.

UPDATE: More pictures

2013-02-20

Exhaust manifold leak

Last summer I bought new exhaust manifold because the old EU4 manifold was warped and had a crack in the collector. The new ones has been leaking as well. I don't know why, if it is a quality issue from the factory or if I have managed to warp them myself.

I've been asking around my local workshops if they could help me, but they all have been shaking their heads saying it would be too troublesome to fix the primaries at their milling machine and that it would be too expensive and not worth it. The last one gave me the suggestion to try to simply use some sand paper on a flat surface and grind them myself.

So I did.
I was sceptical at first but I think this will work!


I also went to a welder - Zanders - and had my silencer mounting brackets reinforced. They used to have a bit of flex and maybe that could be a part of the problem with the warped manifold. I still have a bit of flex. If this doesn't work I'll try to mount the silencer to the forward roll cage mount.


I made the brackets myself last summer. I think it is the third attempt, the others has cracked after track driving.

Read here to get an idea how it looks like on the car.

2013-02-11

DIY Cornerweight

I've been looking for corner weight scales for rent at a reasonable price for some time now without success.

At the local Biltema store 130 kg analogue bathroom scales was only €5 each, so I bought a complete corner weight rig consisting of 8 scales for less than what it would cost me to rent racing scales a few hours. Not as accurate of course, but I thought that hopefully they was accurate enough and I can do it any time I want.

Well, they weren't.

When I was standing on a scale, my body weight shifted +/- 10 kg depending on if I was standing on my toes or on my heels.

First I tried with a piece of plywood to even out the weight, but it did not help much. I got the same readings without it and easier to handle.

I repeated the measurements multiple times and the readings was a bit more consistent than I expected, within 10-15 kg. Still not good, but maybe enough for a very rough corner weight adjustment.

Anyway I don't trust them, even for my own body weight.

2013-02-10

Full rollcage

A couple of YouTube clips (here and here) made start thinking about getting a full roll-cage for my car. 

When a found one second hand in UK I went for it. DHL shipped it to me and even if the freight was not cheap it was not as much money as one could expect.


Big boys big toys

The forward frame bosses was easy to find through the side skin using a magnet. I drilled with a small drill and then enlarged the hole with a dremel tool. 

I put protective cardboard on the fenders and scuttle sides and test mounted the cage and realized that the cage fouled the FIA battery master switch. 


I filled the hole with chemical metal. I think that with some padding and paint will make it look ok, but I leave that for now. I've made a new hole 5 cm to the right of the old one. 

A couple of the cage bolt holes was a little bit off, so they had to be enlarged a mm to fit with the chassis.

The hood sticks didn't fit with the cage, so they had to be removed.

The standard half door doesn't fit. Maybe they can be modified and stuck between the cage and car? Lets see about that.

Rear view mirrors direct fit.
FIA Bar + pettystut 11kg
Rollcage 20kg
A bit heavier, but the chassis is probably much stiffer with the cage mounted. 

I need some cage padding, some paint for the old battery master switch hole, and half doors that fit. The trunk cover is also a bit loose now without the hood sticks. 

All of these changes can be reverted (except for the new hole), but it's not something you do every day. It feels like my car is more of a race car now than a road car. I suppose had to decide what path to take some day, and this is probably it. I also don't know what the yearly MOT will say about the cage.


2013-01-16

Oil catch tank

After my engine rebuild I changed the oil system to an open system and needed a catch tank. Until now I've been using a temporary solution which in every way was not very good.

FIA regulations stipulates that engines larger than 2000cc must have 3l catch tank. I'm not competing, but while I'm at it there are no reasons not to conform to regulations.

For some reason catch tanks with 3l capacity are not very common, and those that would fit under the bonnet are even less so. I ended up having one custom made. The price was about the same as buying an existing design from eBay plus vat.


I sent a sketch to Mulberry Fabrications - Mulfab and not much later I had it in my hand. It is very light, only 763g including filter.


The catch tank is fastened using rivnuts. Some day I'll replace the hoses to something more flexible as they're a bit bulky as it is now.


2013-01-12

Front damper spherical bearing play

There was a play in the joint between the rocker arm and damper in the front suspension, noticeable when I jack the car up, removed the wheel and lift the suspension at the hub. I decided to change the spherical bearings.
  • First step was to remove the dampers. Remove push rod from lower wishbone. Undo damper bolts starting with the lower bolt.
  • The misalignment spacers on one of the dampers was tough to remove, but eventually they got out with some help from a blow torch. Warning! Heating bearings could give off hazardous fumes. These fumes can be harmful to the eyes and to the lungs, if inhaled. Source: SKF.
  • Remove retainer circlip with a pointy sharp tool.
  • Carefully remove bearing using a socket and a hammer.
  • Bilstein part number E4-B46-610. Can be obtained from Caterham Parts or directly from Bilstein. You can also find similar bearings at your local bearing shop in different qualities. 
  • When I fitted my new bearings I noticed a small play between the new bearing and housing. I used Loctite 648 retaining compound as glue. I don't want any movement there, or the shocks could easily be ruined. I hope the new bearings will outlive the shocks, as they probably is going to be tough to remove in the future. (Heating them might work)
  • Reassemble. A good opportunity to replace the bolts and nuts as well. 
Note: I have the "race spec suspension" on my car. The procedure and part numbers may be different on the road spec dampers.

I changed the upper bearings on both sides as I thought that would be enough. Now when the suspension is reassembled I can still feel a small play in one of the lower bearings, sigh...


2013-01-09

Replacing front bushings

I've noticed that my front wings move quite a lot when I brake, and that have become worse over time. I also have a brake judder on the front. My suspicion was the rubber bushings on the front suspension.

Working on cars are fun fun fun
Removing the old bushings was a real PITA. The worst thing I've done on the car so far. On the CSR the rearward lower wishbone bushings are located in the chassis in a very tight location. The front bushings are in the removable wishbones and a bit more manageable. But to remove the ones in the chassis takes lots of swearing and bloody knuckles.

I tried to press them out with a threaded rod, nuts and washers with no luck. At the end the only thing that worked was burning out the rubber with a blow torch and then sawing through the outer ring with a Dremel milling tool using an extension cable to be able to reach. The best thing would be to cut through on opposite sides of the bush but the tight location makes that (almost) impossible. Even then it was not easy to get them out but eventually they gave in. Be careful not to cut too deep and damage the chassis.

Bushings can be made up from many different materials with different characteristics.


Except for completely stiff rose joints, Delrin is what racers seem to prefer because of their stiffness and self lubricating qualities. Unfortunately no complete kits are available in Delrin, and therefore I bought Powerflex bushings out of laziness. The opinions about Powerflex (and other poly-bushings) vary to say the least. If they doesn't work I can reuse the hardware supplied with the bushings and make up my own bushing material in Delrin.

Rubber bushings are not necessary wrong. But as I wrote, removing them is something I rather not do again. Other types of bushings are much easier to replace.


Despite of what Poweflex website says the correct part numbers for the CSR are four PF8-901 bushings and four PF8-902 bushings per car (front suspension only). They are sold in pairs.

The smaller PF8-902 bush comes with a special bolt as they're too small to have room for an inner sleeve, but I used the standard 3/8"x2.5" for the bottom rear bolt as the supplied bolt was too short.

Lets hope this works.

2012-12-23

Front cover oil leak


Since I rebuilt the engine I've had an small oil leak somewhere around the front cover. It has not been any problems at all with normal street usage, but after a track day the the leaked oil makes a mess from the front cover and rearwards.

I had my dampers dismounted for another reason and now I had plenty of space in front of the engine. I removed the starter motor to be able to lock the flywheel with a chisel when removing and tightening the front pulley bolt.

I used CRC Gasket Remover to  remove the old sealant a bit easier.


New pulley bolt, new front mainshaft seal, new diamond washer, new bead of RTV sealant.


Because the front pulley was removed I had to set the cam timing again. Easy when you've done it before.


2012-12-18

Dry sump blanking cap

New vs old
On the EU4 CSR 200 there is a hose between the external dry sump oil tank and the dry sump. When I rebuilt my engine I changed to an open oil system, and that hose was no longer needed and the unused hole in the sump needed to be blanked.

The problem is that it uses a very unconventional thread: MF22x2.0

After many failed attempts to find a fitting blanking cap I finally went directly to the source - Titan Motorsport, and of course they had one.

So for the record, the part number is:  A1016510200A3


For both theirs and my convenience I ordered it from Burton, who in turn got it from Titan.


2012-10-13

GellerĂ¥sen end of season

Beautiful crisp autumn day at GellerĂ¥sen. Crisp indeed. In the morning the temperature was -4 degrees C and there was frozen water on the puddles. I was running an old and square set of slicks, and the grip was close to nothing until the afternoon when the temperature rise to about +5.

It was several years ago I visited GellerĂ¥sen and I can't say I know the circuit very well. It was lots of traffic and mixed slow and fast cars, and for some reason some of the slower cars refused to move aside when someone faster came from behind. One cars even used to block me. Why is  that? It is so easy to leave some room, and it it nothing worse than to wait the entire lap until the straight. At the end of the day I got a couple of clear laps and managed a good 1:10.1 lap! I'm sure that time can be improved by several seconds with some practice and better circumstances, but it is a fast time and I'm really satisfied.


Sleep tight
 A wash, a last short ride to dry the brakes and into the garage for the winter. No big plans for this winter, at least not yet...

2012-10-06

Mantorp wear and tear

An humid day at Mantorp with rain in the morning and dry after lunch. One of those days when nothing felt good. I pushed harder and harder but the lap times stayed high and today's best time was 1:23.0. A Camaro cup team confirmed that the track was slower than usual because of slippery rubber from drift cars the days before. Still I didn't feel like I drove as good as I could have.

A couple of other things didn't go very well either.
Cracked wing with zip tie

First my right front wing went loose and cracked. Back in the pit I drilled a small hole and put it back with a zip tie. The next lap the left wing went loose...

The oil catch tank got full and spew oil in the engine bay. I don't know how that is possible but that is what happened.

The exhaust manifold sealant didn't hold and the leak is back. Another winter project.

The orange colour is where the pad material ends.
Rear brake pads worn out completely. I have ordered a new rear set of Pagid RS4-2 (1158 for my calipers). When the front pads wear out I'll try a different brand and see how they compare. I'm also considering installing a pressure reducer valve to rears and use the same compound on both ends. (Right now I use Pagid RS14 on the fronts and RS4-2 on the rears)

The A frame bushings are worn. At least I think so. When I brake I can see the wings move much more than they did before. I'm thinking of replacing them with Powerflex bushings during the winter, but they sure are expensive!?

One more trackday before the winter, this time at GellerĂ¥sen. Lets hope it doesn't rain.

2012-09-27

Exhaust gasket leak

It seems I can't get the exhaust manifold to seal against the head no matter what I do. I have even bought new primaries. It still leaked.


Now I have removed the gasket completely and tried to seal it with this stuff. No leaks, but lets see how long it lasts.

2012-09-17

Min Stora Dag charity event

Min Stora Dag, or in english something like "My Special Day", is a non-profit charity organisation that tries to fulfil wishes from very sick children. The last three years they have organised an event on Mantorp where sportscar owners drives them around a racetrack. This sunny autumn day it was more than 100 very nice and fast cars that have come to the race track, and about 100 sick children with their families.

My car was very popular and I drove lots of children and their parents. Some older children asked me to "Go as fast as you can!" and it was always fun to see them shaking when getting out of the car, and then see if I could make their parents even more terrified than their children :-) Just to be clear - I never pushed any limits this day. An accident on a day like this would be disastrous.

One of the strongest impressions were this blond little girl Sigrid. I asked her if she wanted to go slowly or fast around the track and she responded "I know these are very fast cars. So please start off slowly and maybe you can go faster after a while." We agreed that she'd use the thumbs-up sign if she wanted to go faster, and thumbs-down if she wanted me to slow down.

When we got out on the fast straight she raised her hands above her head, just to feel the wind, and I could see she laughed loudly inside her helmet.

Back in the pit she laughed and said it was fantastic, and the big smile on her face was enough of reward for me for the the whole day. My body shivered for several minutes just for seeing how happy she was and how much she enjoyed it.

A great day and very rewarding, for everyone I think!

A day like this it would have been so much fun just to go around with my camera taking pictures, but I was so busy driving I didn't take a single shot. These are from various sources and I hope no-one mind that I'm using them here.

2012-09-04

Yearly MOT - No problems, no worries!


Did two changes to the engine before the test:

  • Put a hose from the catch tank into the airbox (closed oil ventilation system)
  • Changed target lambda to 1.00 on low load and enabled closed loop lambda control.


At about 2500 rpm

2012-09-02

Progress


Sometimes it is fun to look back and see how much progress has been made over the years. I'll never forget  my first track day with my Caterham. I'd traded in my Porsche 996 C2 for a Caterham and was terrified and a bit regretful because the Caterham experience was so much more in every way and I was not sure I was ready for it. I'm the first to admit I was not very good at driving back then.


2008-09 Green 1:38.87
First visit. Windscreen, terrified. CR500

2009-08 Brown 1:30.76
Getting confident, got some tutoring by a professional driver. CR500

2011-10 Red 1:27.69
Best time with old engine, ACB10

2012-08 Blue 1:21.78
New engine and second hand slicks

Over the years that is an improvement of 17 seconds!


2012-08-28

Mantorp - slicks vs CR500

Mantorp, again. A new personal best, again - 1.21,8!!! That is 1.5 seconds faster than last time, and I haven't changed anything except put on a new set of (second hand) rubber. I never thought I could reach laptimes like that!

At the end of the day I mounted a set of standard 15" rims with Avon CR500 tires just to see the difference compared to the Dunlop Radical slicks. 1.24,8 or 3 seconds. That is a big difference, no questions about it, but with the CR500 the car suffered tremendously from understeer and I think the difference would be less if I took the time to adjust the suspension to suit the tires better. Not to mention tires with better dry performance than CR500.

Slicks in red, CR500 in blue.

I also put zip-ties on the damper rods and that confirmed my suspicion that the front dampers bottoms out onto the bump stops. I don't know if it is while cornering or while braking, but that is something I should look into next time.

Riding on the bump stops is not necessary a bad thing. Read an article here.

2012-08-23

OptimumLap simulation software

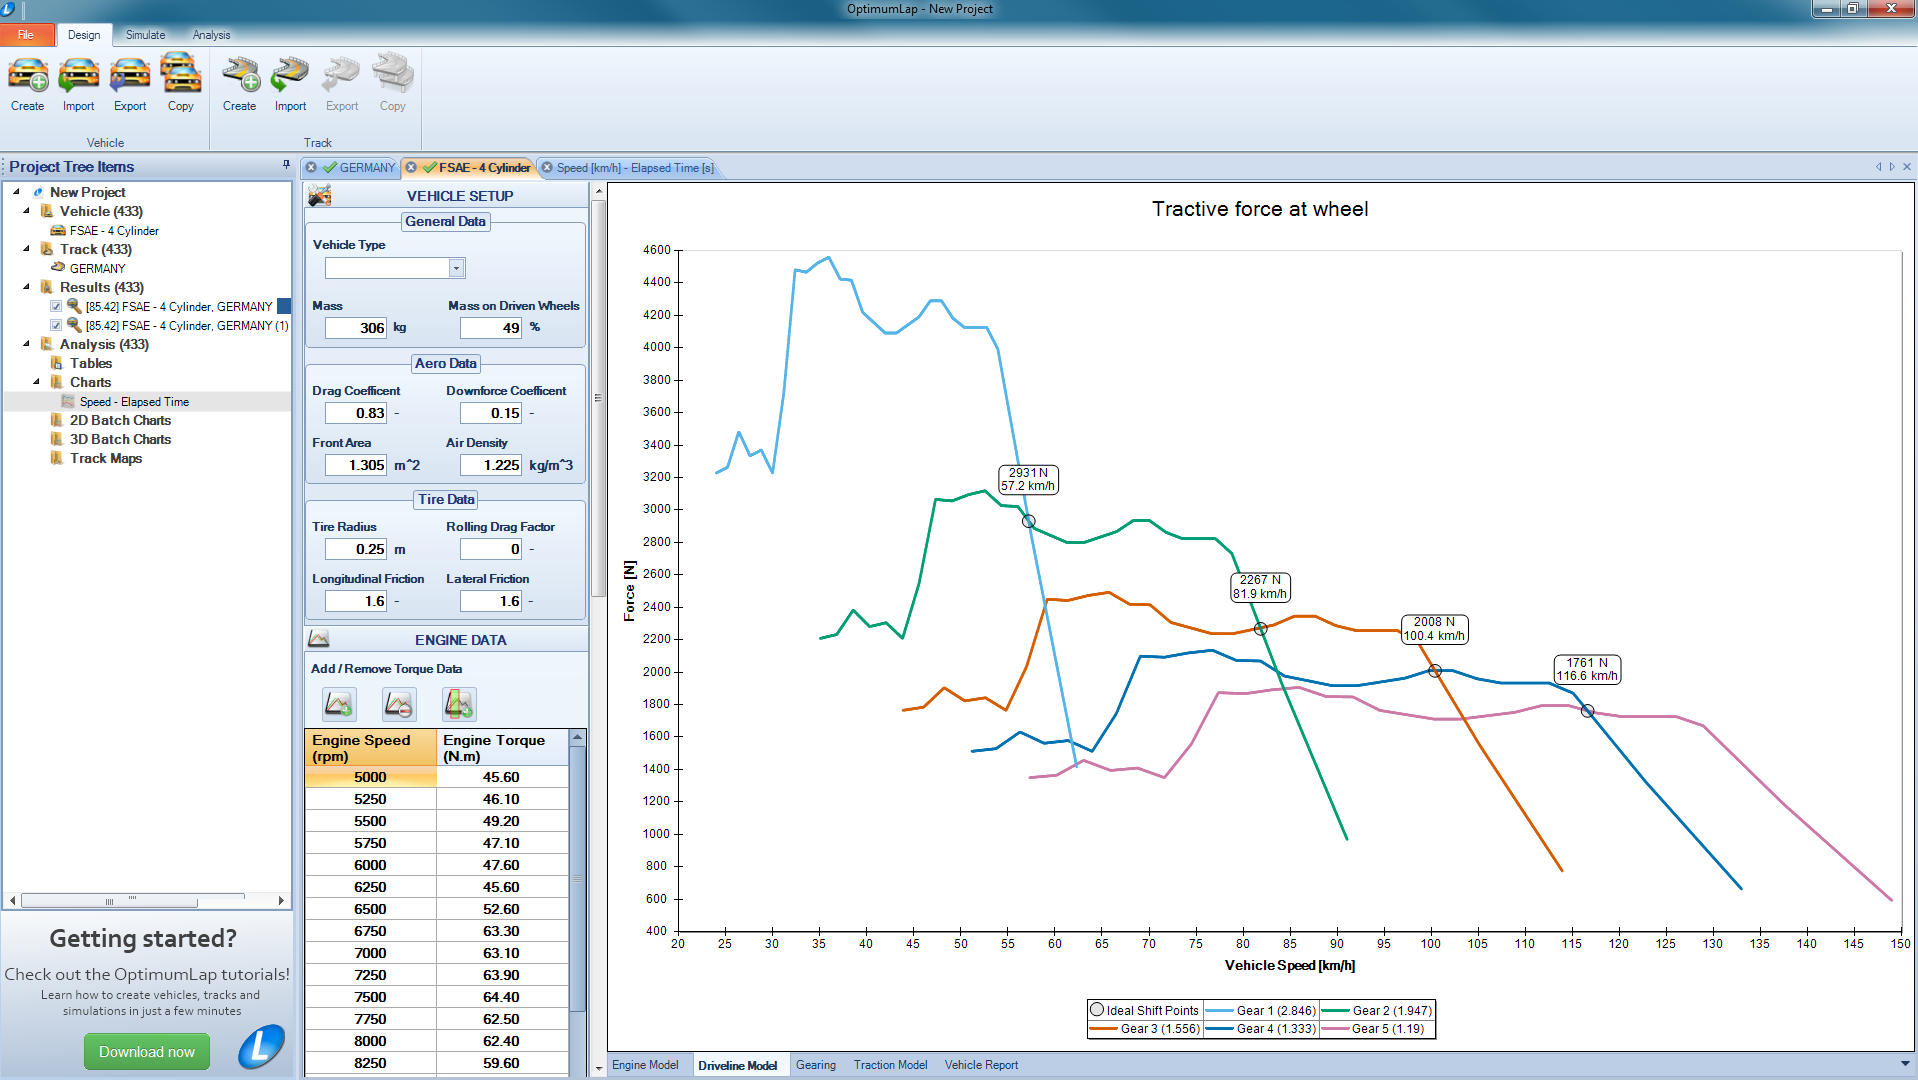
I got an invite to test a new software for simulation of how fast a car can run one lap on a race track, called OptimumLap. It uses a simplified model of how a car behaves on a race track, but according to the company, despite the simple model it gives results that are accurate within 10%.


I have only good things to say about the software, and if you get the chance I suggest that you should try it out. Atleast for me it was a bit of an eye opener.

In the software I constructed seven variations of my car, and run it in the simulator on two Swedish tracks. The simulated lap times was a bit from my real world actual lap times, but it is still very useful for finding out what changes to the car could make a significant improvement.


Mantorp - A wide track with a long straight and high average speed.

  1. Current setup: 85,72s
  2. 10% more tire grip: -2.43s
  3. 160N more downforce @100 km/h: -1.05s
  4. 10% more power at rear wheels: -0.80s
  5. 10% less drag: -0.28s
  6. 30 kg less weight: -0.26s
  7. All of the above: -5.66s

Gotland Ring - A very technical track with hills and cambered corners.

  1. Current setup: 83.81s (I wish...)
  2. 10% more tire grip: -1.55s
  3. 160N more downforce @100 km/h: -1.34s
  4. 10% more power at rear wheels: -0.31s
  5. 10% less drag: -0.19s
  6. 30 kg less weight: -0.04s
  7. All of the above: -4,60s


The results are quite interesting.
  • Tyre grip is very important, of course. No big news here.
  • Some extra horses would be nice on Mantorp, but expensive and 10% more hp is a lot.
  • Working on reducing drag is nice, but not that much to work on.
  • Reducing weight does almost nothing on Gotland Ring!
  • Adding downforce does a lot! Over a second on both tracks, that is really something that could be improved!
Adding downforce to a seven type car is almost as swearing in church, but what if it is a wing that could be removed when not on a track? I have no idea of how much downforce a wing could provide, but to me 160N at 100km/h doesn't sound completely unreasonable? Of course the drag would increase as well, but it would still be an easy and cost effective way to loose some lap time. I believe a front wing would be most beneficial since I use to experience some understeer on high speed corners, probably because of lift.

A quick Google search gave me this: Levante front wing 


I'll start looking for options...

2012-08-17

Paddle shift

Here is a can't miss video of a CSR 260 with Geartronics Paddle shift and a straight cut Quaife 60G 6 speed sequential gearbox.


Unfortunately the price tag for a system like this is up at the roof, and personally I'm not sure I could live with the gearbox noise even if my car is quite track oriented.


2012-07-18

Mantorp and two new sets of slicks

Back to Mantorp. It may appear as it is the only track I go to, and yes, that is sadly true.  I wish I could go to more tracks but Mantorp is both convenient and economical for me. 

Increased front neg camber with 0.5 degrees (two turns).
Little more tyre pressure than last time. (about 22-23 psi. 19.5 psi cold.)

And I shaved off another big second from my personal best! - 1.23,3.

I ended the day early because I didn't want to ruin a good day by breaking something.

I found a new source for second hand Radical slicks from whom I picked up two complete sets on the way home.


2012-06-25

Fuel injector voltage compensation

I've noticed that the engine sound changes when the cooling fan kicks in. Not a big deal, I thought, but now I understand it is something worth a bit of attention.

Injector "dead time" is the time between pulse and fuel is delivered. What makes it a little bit complicated is that the dead time is not only voltage dependent but also fuel pressure dependent.

When the fan kicks in, or the headlights are lit, the battery voltage is dropped. The ECU have a voltage compensation map that add some time to the fuel map. If that map isn't correct the engine rpm may drop, causing the alternator to generate less current, even less fuel, and the engine could eventually stall. If we use closed loop lambda control the ECU would stable the engine within a second, but what would be written to the long term fuel map?

In my case the compensation map set up was not correct for my injectors.

The easiest way to measure injector dead time is to have the engine running and measure the lambda. Then remove the alternator control cable to drop the voltage about 2v, and see if the lambda changes. Adjust the map until the lambda reading is as before the alternator was disabled.

A more accurate way is to start the engine, remove the battery and connect a variable voltage source, and then disable the alternator and measure lambda at different voltage levels and adjust the map accordingly.

Or, you could do as I did and Google the injector's specs.


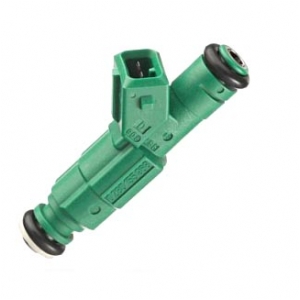
Bosch "Green giant" injectors at 4 bar, MBE 9A4:


It worked.

2012-06-21

Mantorp

Very windy, sunny day. The wind kept the top speed down on the long straight.

Used 13" Radical slicks. Started with ~20 psi hot, but it got slippery a couple of turns if I pushed a bit too hard. Raised to ~22 psi after a talk with the Radical guys. It certainly improved but I think I could go even higher.

Inertia switch released twice on the straight! Then I short wired it...

Experienced some mid corner oversteer when pushing hard. Maybe the rear suspension bottoms out? Next time I'll investigate this.

I've always had problems with fuel surge in long right hand corners when having about 1/4 of fuel, but it was even more obvious now. The fact it is in the right hand corners doesn't make sense to me, since the fuel pump is on the left side of the tank. Here is an interesting thread on Blatchat.


Best time 1:24.3!!! That is almost two seconds faster since last visit!

I need a better microphone to my GoPro.

2012-06-05

Inertial switch


Who said highway driving isn't exciting?

Fortunately it was only the inertial switch that cut off the fuel pump. Never happened before and took a while to figure out standing roadside with oncoming darkness and decreasing battery power.

A press on the top and I was back on the road.


Inertial switch